Tips to edit your photos like a professional
Hai friends,I will explain you how to edit your photos like a pro editor's. Now a days lot of Photos editing apps are available in internet for both android and iOS device, in that I will suggest you one of the most widely used photo editing app picsart, which is most convenient and easiest app to edit your photos.

In this app you can edit your photos with your own creativity. This app will contains most of the editing effects, and the tools also very simple and easiest manner.


3D Mobile Screen Edit:
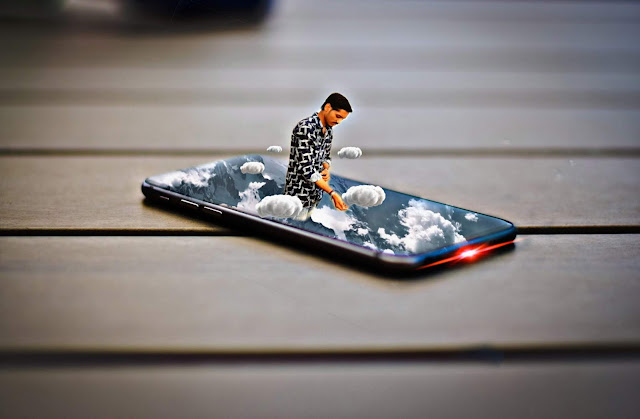
This post will talk about 3d editing. We are going to edit a normal mobile screen to a 3d mobile screen with a cloudy screen in to a person standing. The edited image in below.

1. Choose a application
There is a lot of Photos editing application available in internet. Now iam going to choose an app PicsArt. The downloading link of the picsart app for Android users: Click here to download

2. Choose a background image for your edit
I will choose an a landscape mobile photo image for editing. The downloaded link of the background image will given below, download and start your editing:
Sources files downloading link:
1. Background mobile image:
Download here
2. Sky image:
Download here
3. Cloud image :
Download here
Download here
2. Sky image:
Download here
3. Cloud image :
Download here
3. Edit your photos:
- Step 1: Open PicsArt application.
- Step 2: Insert the background image. Background image download link given above.

- Step 3: Add the image you want to paste on the background image, drag and fix the exact space on the background image. Reduce the opacity range and erase the parts you don't want to fill on background, after erase make the opacity on full range.

- Step 4: Add lens flare for making the image looks more beautiful. Change the lens flare color by changing the hue value.

- Step 5: Add your selected image which overlay on the background mobile image. Before add image make the image to a sticker. Place your sticker on the exact place of your background image and reduce opacity and erase the sticker fixed place for make it more realistic.


- Step 5: Add your selected image which overlay on the background mobile image. Before add image make the image to a sticker. Place your sticker on the exact place of your background image and reduce opacity and erase the sticker fixed place for make it more realistic.

- Step 6: Add Cloud images on over the background image for make it lokes like a 3d image.

- Step 7: Final step is to add a effects to make it look more attractive

Thank you for reading the tutorial article and I hope that you all will learned how to edit like a pro. Please give all your support for writing more blogs. Post your valuable comments and follow our page for more.
If you want to learn by video check the tutorial video:
If you want to learn by video check the tutorial video:


0 Comments